
Table of Contents
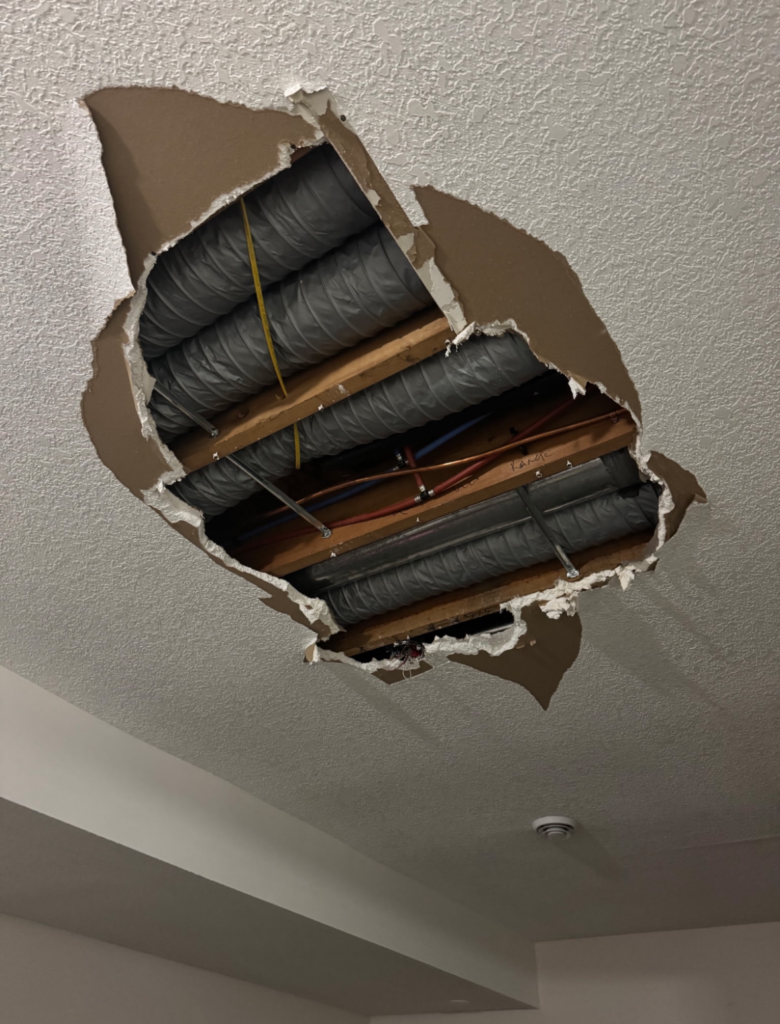
Almost every drywall patch question comes down to one measurement: how big is the hole, and is there anything solid behind it?
Get that right and the method picks itself. Get it wrong and you end up with a repair that either cracks out in a year or shows across the room in the afternoon light. This walks through every common hole, smallest to largest, with the method a finisher would actually use, and it is honest about which ones are worth doing yourself.
Quick reference:
- Nail, screw and anchor holes: lightweight compound, two thin coats
- Dents and dings: fill and feather, no patch needed
- Torn paper and peeled paint: seal first, then fill
- Up to about two inches: mesh or metal patch over the hole
- Two to six inches: a California patch, no backing required
- Six inches and up: cut back to a square, add backing or hit the studs
- Anything on a ceiling: same methods, harder execution
Nail holes, screw holes and anchor holes
The easiest category, and the one people still manage to make look bad.
Pull the nail or back the screw out. For a plastic or metal anchor, either back it out with pliers or tap it below the surface with a nail set so it is not sitting proud. Do not just mud over a protruding anchor, it will telegraph through.
Fill with lightweight joint compound or spackle using a flexible putty knife, then scrape it flush. The mistake is loading one thick coat. Compound shrinks as it dries, so a single heavy fill leaves a dimple. Two thin coats, sanded lightly between, sit flat.
A wall anchor that pulled out and took a chunk of the gypsum with it is no longer an anchor hole. Treat it as a small hole, below.
Dents, dings and furniture scuffs
A dent where the paper is still intact and only the gypsum behind it is crushed does not need a patch. It needs filling and feathering.
The whole job is in the feathering. A dent filled in a two-inch circle will read as a bump. The same dent filled and then feathered out eight or ten inches disappears, because the transition is too gradual for your eye to catch. Wider than you think, thinner than you think.
Torn facing paper and paint that peeled off the wall
This one gets handled wrong constantly, and it is worth its own section because the fix is counterintuitive.
When tape, a poster, a mirror or a stubborn piece of trim pulls paint off and takes the drywall’s facing paper with it, you are left with exposed gypsum core and fuzzy torn paper edges. If you spread joint compound straight onto that, the raw paper soaks up the water in the mud, swells, and bubbles. You will sand it, it will look fine, and it will blister again when you prime.
The correct sequence is to seal it first. Trim off any loose shreds with a sharp blade, then seal the exposed area with a sealing primer made for the purpose, oil based or shellac based. Once that is dry the surface is stable and it takes compound normally. Then fill, feather wide, and prime again before paint.
Skipping the seal coat is the single most common reason a small cosmetic repair looks worse after it is fixed than before.
Small holes, up to about two inches
Doorknob holes, a bad drill location, a hole punched for a cable that moved.
The straightforward method is a self-adhesive patch: a mesh or thin metal screen with adhesive backing that spans the hole. Clean and flatten the edges first, trim back any loose paper, stick the patch down centered, then coat it.
Coating is where these go wrong. You need three thin coats, each one wider than the last, feathered well past the patch edges. A setting-type compound for the first coat is harder and shrinks less than premixed, which helps on a patch that has air behind it. If you can still see the outline of the mesh after two coats, you have not gone wide enough, not thick enough.
Mesh patches have a real limit. Past a couple of inches there is too much unsupported span and the center stays slightly soft, which eventually shows as a faint ring. Over that size, use the next method.
Medium holes, two to six inches: the California patch
Also called a blow-through patch, a hot patch, or a butterfly patch. It is the method a professional reaches for on a mid-size hole, and it is genuinely clever because it needs no backing and no stud.
How it works: cut a piece of new drywall a couple of inches larger than the hole in both directions. On the back side, score a rectangle matching the hole size, then snap and peel away the gypsum core outside that line, leaving the front facing paper intact as a flange all the way around. You end up with a plug of drywall with a paper skirt.
Square up the hole in the wall, butter the back of the paper flange and the wall around the opening with compound, press the plug in so the core fills the hole and the paper flange beds into the mud, and squeeze the excess out from under the paper with your knife. The paper flange is doing exactly what paper tape does on a seam.
Two or three coats over the top, feathered wide, and the repair is stronger than a mesh patch with a flatter result. This is the right answer for most of the holes people actually call about.
Large holes, six inches and up
At this size you stop patching and start replacing a piece of drywall.
Cut the damage back to a clean rectangle. If the opening is wide enough to reach framing, cut back to the center of the studs on each side so the new piece has something to screw to. If it falls between studs, add backing: a piece of wood or metal strip screwed inside the cavity so it spans the opening and the new drywall has something solid to fasten to on all four edges. Drywall with no backing on an edge will crack along that edge, every time.
Cut the new piece to fit with a small gap, screw it to the framing or backing, then tape the seams with paper tape and compound. Three coats, feathered, and the seams get treated like any other drywall joint because that is what they are.
Before you open anything up on a wall, know what is behind it. Electrical, plumbing and ductwork all live in walls, and a hole large enough to need backing is usually large enough to reach them.
Butt joints and outside corners
Two situations worth naming because they behave differently from a flat patch.
A butt joint is where two sheets meet on their cut ends rather than their tapered factory edges. There is no recess to hide the tape, so the compound has to build up and then feather out much further on each side, often a foot or more, to avoid a visible ridge. If your patch created a butt joint, plan on a wide feather.
An outside corner, like the edge of a wall or a window return, has metal or vinyl corner bead under the compound. If the corner is dented, the bead itself is usually bent, and no amount of mud over a bent bead will come out straight. The bead gets cut out and replaced, then re-coated. This is the repair most likely to look obviously patched when it is done the easy way.
Ceiling patches
Every method above works on a ceiling. All of them are harder there.
Gravity works against you, compound wants to sag, and ceilings are usually textured, which means the patch has to match knockdown, orange peel, skip trowel or popcorn rather than just being flat. Ceilings also get raking light from windows and fixtures, which is the least forgiving lighting there is for a repair.
If the ceiling hole came from a water stain, fix the source before anyone patches anything. We repair and replace drywall, we do not repair leaks. Our post on water-damaged drywall covers when a wet ceiling can be saved and when it has to come out, and water damage repair covers the repair side.
If the ceiling is a popcorn ceiling in a home built before the early 1980s, do not scrape or sand anything until you have read about asbestos testing before removal.
The part that actually makes a patch visible
Here is what most guides leave out. A patch rarely gets noticed because the drywall work failed. It gets noticed for two other reasons.
Texture. If your walls or ceiling have any texture at all, a perfectly flat patch is a flat spot in a textured surface, which is just as visible as a bump. Matching knockdown, orange peel or skip trowel is a spray-and-knock-back skill, and matching an existing texture takes a test panel rather than a guess.
Paint sheen. Fresh compound absorbs primer and paint differently than the surrounding aged wall. Touching up just the patch leaves a halo that shows at an angle even when the color matches exactly. The fix is priming the repair and then painting wall to wall, corner to corner, or at minimum out to a natural break.
That is why a repair can be mechanically perfect and still look like a repair, and it is usually the reason people who patched it themselves end up calling someone.
What you can reasonably do yourself
Honest answer, no upsell:
Go ahead: nail holes, screw holes, anchor holes, dents, and small mesh-patch holes on a flat painted wall you are willing to repaint.
Think about it: a California patch is learnable, but your first one will not be your best one, and practicing on a living room wall is an expensive place to learn.
Call someone: anything needing backing or new framing, anything on a textured surface you need to match, anything on a ceiling, bent corner bead, water damage, and any repair in a room you are not prepared to repaint.
When homeowners call us about patches
Mostly four reasons. A hole that is bigger than the patch kits at the store cover. A patch they already did that is visible and will not stop being visible. Texture that needs matching. And move-out or pre-listing repairs where a wall full of anchor holes and scuffs has to look new before photos.
We take small repairs. A single patch is a call worth making, and we would rather look at one hole than have you make it three.
Drywall, sheetrock, gypsum board: same thing, and we hang, tape, patch and finish all of it. More on what is involved at drywall repair, and if the room needs paint afterward we do that too at interior painting, which is usually the difference between a repair you cannot find and one you can.
We work across the north Twin Cities metro, including Forest Lake, Blaine, Elk River, Maple Grove, Plymouth, Hugo and Coon Rapids.
Drywall patch questions
What is the biggest hole you can fix with a patch kit?
Self-adhesive mesh and metal patches work well up to roughly two inches. Past that there is too much unsupported span in the middle and the repair stays slightly soft, which eventually shows. Larger holes want a California patch or a replacement piece with backing.
Why does my drywall patch keep cracking?
Usually because an edge of the new drywall has nothing solid behind it, or because the compound was built up in one thick coat instead of several thin ones. A patch needs support on all four edges and it needs to shrink in stages.
Why can I still see my patch after I painted?
Two likely reasons. The patch was not feathered wide enough, so there is a visible transition, or fresh compound took the paint differently than the surrounding wall and left a sheen halo. Priming the repair and painting the full wall solves the second one.
Can you match my wall texture?
Texture matching is its own skill and it starts with identifying what you have: knockdown, orange peel, skip trowel or smooth. A test area is how it gets matched properly rather than guessed at.
Do you do small repairs, or only big jobs?
We take small repairs, including a single patch.
Do you repair plaster?
We do drywall. If you have genuine plaster that needs plaster work, you want a plaster specialist.
Need a patch done right?
Send us a photo of the hole and we will tell you honestly whether it is a job for a patch kit or a job for us.
Estimates are $25 on site, credited toward the project when you hire us. That means the person who shows up has time to actually look at your wall and the light it sits in.
Superior Drywall is based in Wyoming, MN. Call 763-501-9571 or request an estimate. Monday through Saturday, 7am to 7pm, 60+ five-star reviews on Google.